The Ring Solar charger should keep your Ring Video Doorbell battery fully charged without having to connect it to your home power supply. Installing the system is usually easy and it should start charging your Ring Video Doorbell without problems.
However, some users have reported that the ring solar panel fails to charge the battery even after being properly installed. There could be many reasons for this like fault in wires or debris inside the solar panel. It could also be due to damage to the solar panel.
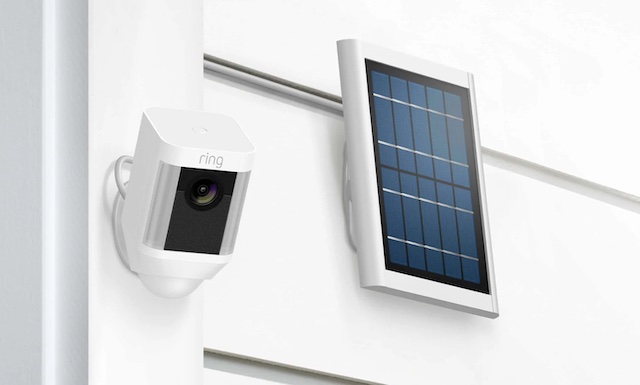
Ring Solar Panel Not Charging: Causes & How to Fix
If the solar panel that comes with your Ring Video Doorbell isn’t charging the device as expected, the following details should help you figure out the cause of the problem and how to fix it on your own.
1. Reinstall the Ring Solar Panel
The first thing to do will be to try and reinstall the Ring Solar Panel. Chances are that there are debris or blockages inside the wire plug which are blocking the connection. You could also find loose wires or probably that you’ve attached the wrong wires. Check for issues and reinstall the solar panel to see if it works.
2. Check for Solar Panel Defects
If everything is in order, then the solar panel might be faulty. Check the Ring Solar panel for defects using the Ring app. In the Devices health area check if the app is showing solar panel connected or not. If the solar panel is not connected, then it might be defective.
3. Check the Battery Level
Take note that seeing the Solar Panel not connected in the Ring App doesn’t always mean that the device is defective. In order to extend the lifetime of the lithium-ion battery in your Ring Video Doorbell, the solar charger will only begin to charge the battery when its percentage drops below 90%.
If the battery is above 90%, you may see the solar device’s status as “Not connected” in your ring app. This is not a reason for concern.
4. Check for Incorrect Installation and Placement
To ensure that the solar charger gets enough sunlight to charge the app, it is recommended that you avoid placing it on the porch or in shady places. The Ring Solar Panel requires three to four hours of direct sunlight daily to charge your device.
If it is not getting the required sunlight, it won’t charge your device properly. Ensure there are no obstructions that could cast a shadow on the solar panel. If you live in an area with a lot of cloudy weather, you might not get the right amount of sunlight required to charge the solar panel.
Take note that your solar panel won’t help your Ring Video Doorbell or charge the battery well enough in winter. The reason for this is obvious. There won’t be enough sunlight to power the panel to charge the battery. This, however, doesn’t mean that the solar panel is defective.
5. Could Heavy-Duty Use Be The Problem?
If your battery level is below 90% yet the solar panel fails to keep it charging well enough or the Ring app says the doorbell is charging but the battery life is very short, this could signal an overuse problem. The issue is not with the solar panel but rather how often the doorbell is used.
If the battery life is short even when the solar power device is installed, it simply means that the doorbell’s daily activities and power drain is more than the solar charger can provide. This is mostly true if you receive a lot of motion events in a day. To maintain the battery life, try adjusting the sensitivity lower to reduce unwanted motion.
6. Check the Connection
For those users that aim to boost the power supply from the solar power charger by hooking more than one solar panel to the Ring Video Doorbell, this is could be the problem behind its inability to power your device. The Ring Solar Panel is designed to only connect with one Ring Video Doorbell so connecting more than one solar panel by any means could cause problems in the system.
You won’t also be able to connect one solar panel to two different Ring Video Doorbells. it is best to stick to the manufacturer’s instructions rating than DIY your way around it. The Ring Solar Panel will save you some bucks in electricity costs while keeping the doorbell active 24/7. To enjoy the convenience, you will have to install the device as instructed.
How to Install the Ring Solar Panel
There are several ways to mount a Ring Solar charger which depend on the material you’re mounting it on. If you’re mounting the charger directly on wood, you can do so using the screws and screwdriver provider. However, if you’re mounting to concrete, brick, or stucco, follow the steps below
- If you have already mounted your Ring Video Doorbell on your home, remove the mounting bracket
- Using the screws and anchors, mount the solar charger to the exterior wall.
- Connect the micro USB cable to the charging port on the back of the Ring Video Doorbell
- Attach your Ring Video Doorbell to the Solar Charger
- Tighten the screws on the bottom of the Ring Video Doorbell and confirm it is secure
For the Solar Charger to work, you must avoid mounting it on porches or in shady areas.
You won’t have to activate the solar charger in the Ring App. Once installed, plug it into the Ring Video Doorbell. The solar charger will start working and charge the device. This can only happen if it receives the required amount of sunlight.
Final Thoughts
Ring Solar Panel problems are usually due to confusion about how the system works. The solar charger won’t charge your doorbell if the percentage is above 90%. If the percentage is below 90% and yet it won’t charge, it could be due to insufficient sunlight.
However, if it was sunny all day and the solar panel got all the sunlight yet still won’t charge, then there might be a problem with the connection or the solar panel is defective and will have to be checked.


