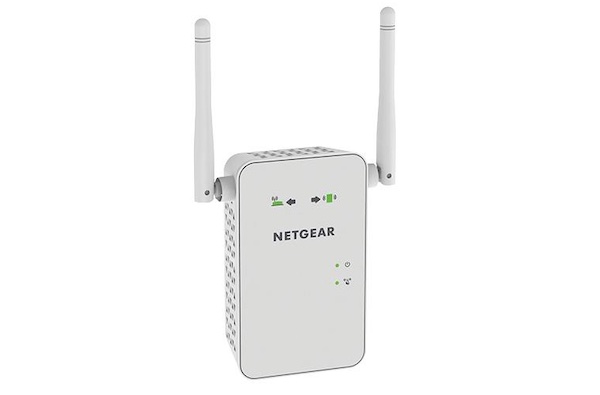
If you’re experiencing problems setting your Netgear WiFi extender using WPS, you can easily go without the WPS option using the web browser setup. This will also come in handy if you want WEP security. Since WPS doesn’t support WEP security, it might leave your network exposed if you need that option to keep you secure.

Netgear WiFi Extender Setup without WPS
Below, we have provided a simple step-by-step guide to setting up your Netgear WiFi extender without WPS.
Connect with Web Browser Setup
If you don’t want to use WPS, you can use a web browser to log in to the extender and set up the WiFi connection to your existing WiFi router.
To use a web browser to connect the extender to your WiFi router;
Using a WiFi network manager on a computer or WiFi device, find and connect to the extender WiFi network NETGEAR_EXT.
- After the connection with the computer or WiFi device has been made, the Device Link LED lights.
- Launch web browser.
- In the address field of the browser, enter www.mywifiext.net
- The New Extender Setup screen displays.
- Click the NEW EXTENDER SETUP button. If you’re login into the extender for the first time, the Create Account screen will be displayed. If it does not display, visit www.mywifiext.net.
- Complete the fields on the Create Account screen and click the NEXT button.
- You will be prompted to select your country or region from the Regional Settings menu and click the NEXT button.
- Click the WIFI RANGE EXTENDER button. The extender will scan for WiFi networks in your area and displays a list.
- Select a WiFi network to extend and click the NEXT button. You can choose to extend both WiFi bands. If not, clear the 2.4 GHz WiFi Networks or the 5 GHz WiFi Networks check box.
- In the Password (Network Key) field, enter the existing WiFi network password or security key and click the NEXT button.
- Set the network name (SSID) and password for your new extender WiFi network, and then click the NEXT button.
- Using a WiFi network manager on the computer or WiFi device, connect to the new extended WiFi network. Repeat this step for all of your computers and WiFi devices.
- Click the CONTINUE button. A message will be displayed confirming that the extender is connected to the new extended WiFi network.
- Click the NEXT button. The registration screen will be displayed.
- Complete the registration fields and click the FINISH button to complete the setup.
- If you do not want to register your extender, you can click the Skip Registration link. However, you must register your extender before you can use NETGEAR telephone support.
- Once registered, the Status screen will be displayed.
- Unplug the extender and move it to a new location that is closer to the area with a poor WiFi signal. Ensure to choose a location that is within the range of your existing WiFi router network.
- Plug the extender into an electrical outlet. Wait a while for the Power LED to light amber and then turn green. If the Power LED does not light, then press the Power On/Off button.
- Use the Router Link LED to choose a spot where the extender-to-router connection is best. The extender will connect to your existing router’s WiFi network.
Use the Extender in Access Point Mode
You can also use the extender as a WiFi access point. This creates a new WiFi hotspot by using a wired Ethernet connection
To use the extender in access point mode:
- Plug the extender into an electrical outlet.
- Wait a while for the Power LED to light amber and then turn green.
- If the Power LED does not light, then press the Power On/Off button on the side of the extender.
- Using an Ethernet cable, connect the Ethernet port on the extender to a router Ethernet LAN port or a remote Ethernet LAN jack with LAN access.
- The extender will join the LAN and creates a WiFi hotspot.
- Using a WiFi network manager on a computer or WiFi device, find and connect to the NETGEAR_EXT (SSID) WiFi network.
- When you join the network, the extender Device Link LED will light up to show that you are connected.
- Launch your web browser and enter www.mywifiext.net in the address field. The New Extender Setup screen displays.
- Click the NEW EXTENDER SETUP button. If you’re doing so for the first time, the Create Account screen will be displayed. If the Create Account screen does not display, visit www.mywifiext.net
- Complete the fields on the Create Account screen and click the NEXT button.
- You will be prompted to select your country or region from the Regional Settings menu and click the NEXT button.
- Click the Access Point button. The extender will check for an internet connection.
- Click the Home Network or Public Network button
- You will be prompted to set the network name (SSID), security option, and password for your new extender WiFi network, and then click the NEXT button. Your settings will be applied and the extender can be used as an access point.
- Using as WiFi network manager on your computer or WiFi device, connect to the new access point network. Repeat this step for all of your computers and WiFi devices.
- Click the CONTINUE button. A screen will be displayed that says you successfully created an access point.
- Click the NEXT button. The registration screen displays.
- Provide the required information in the registration fields and click the FINISH button to complete the setup.
- If you do not want to register your extender, click the Skip Registration link. However, you must register your extender before you can use NETGEAR telephone support.
View Connected Devices
You can view a list of devices that are connected to the extender network.
To view connected devices:
- Go to your computer or WiFi device that is connected to the extender network, and launch a web browser.
- In the address field of your browser, enter www.mywifiext.net.
- When prompted, provide your email address and password.
- Click the Menu icon. The extender menu will be displayed.
- Select Settings > Connected Devices.


